
On December 31, 2026, OER Commons will be retiring all Open Author resources created in the legacy editor (AKA Open Author 1). This document provides steps that users can take to find and preserve their Open Author 1 materials. Read the official announcement here to learn about our rationale and what to expect.
The sunsetting of Open Author 1 materials from OER Commons is a good opportunity for authors to revisit their works and decide what's worth keeping, updating, or letting go of. There are a few ways to save your items if you decide to do so.
WAYBACK MACHINE NOTE:
To help preserve the work authors have invested in creating Open Author 1 resources, OER Commons staff have also submitted the URLs of all Open Author 1 resources to the Internet Archive’s Wayback Machine for long-term preservation. You can find and view a given Open Author 1 resource by taking its URL and searching for it there.
Finding your Open Author 1 resources
We’ve made it easy to spot legacy Open Author materials in your items by adding “LEGACY RESOURCE - ” to the beginning of all legacy Open Author items. To view all of your items:
- Sign into OER Commons and view your saved and authored items by clicking your profile image, and then selecting "my items."
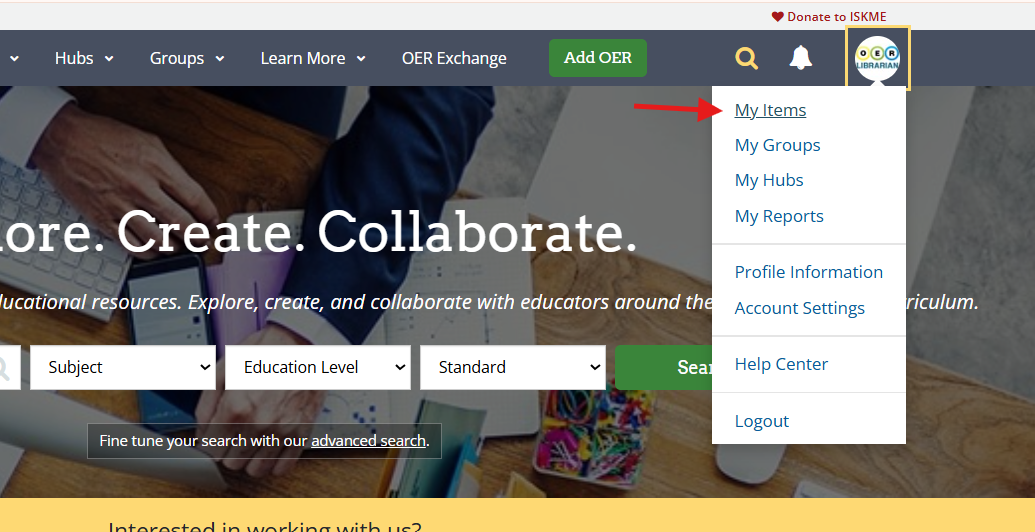
- On the page that loads, type "LEGACY RESOURCE - " in the search bar and press enter. The item list may take a moment or two to populate depending on how many resources you have. Once it's done, you'll see a list of any Open Author 1 resources you've created or saved to your account.
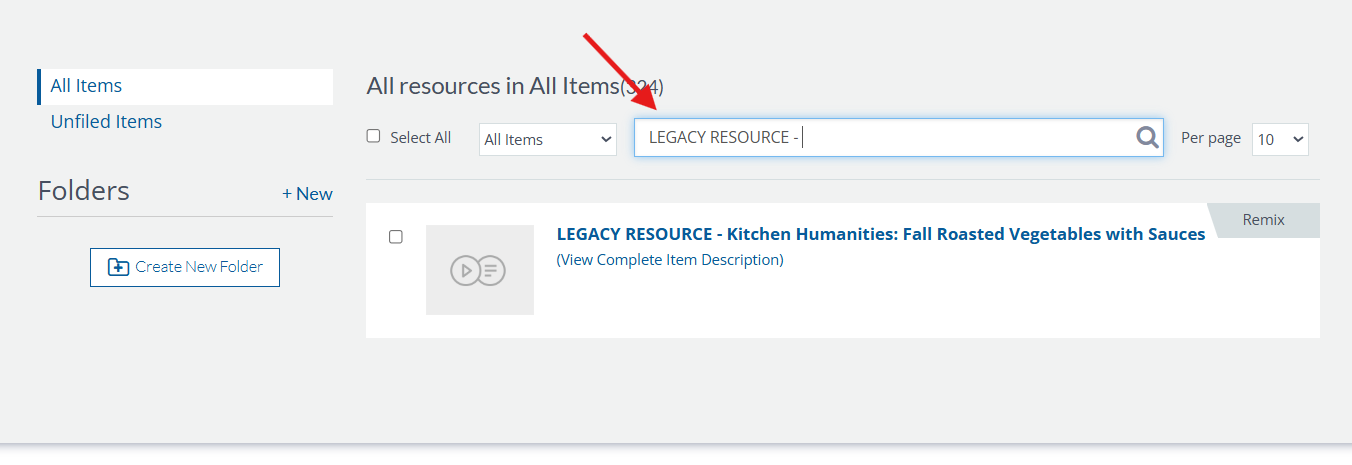
From here, you have a few different ways to save your content.
- Option 1: copy into the new Open Author editor
- Option 2: export to Google Docs
- Option 3: download in a static format
Option 1: copy into the new Open Author editor
If you have Open Author 1 resources and you'd like to ensure they stay available and remixable, recreating your items in Open Author 2 is a great option. In addition to making remixing as easy as the click of a button, it also lets authors take advantage of Open Author 2’s built-in accessibility checker to ensure your resource is WCAG compliant. Here's how to migrate your resource to Open Author 2:
- Open two browser windows, and place them side by side.
- In one window, create a new Open Author resource from the homepage by clicking “Add OER” and then select “Create Resource” under Open Author.
- In the other window, navigate to “My Items” and select the resource you’d like to recreate.
- Copy the content from the Open Author 1 resource into the Open Author 2 editor.
- Once all of the content is copied over, review your new resource and make any changes you think are appropriate so that it's up to date and well-formatted.
- Be sure to use the Accessibility Checker in each text editor window to identify and remediate issues that were present in the original resource:
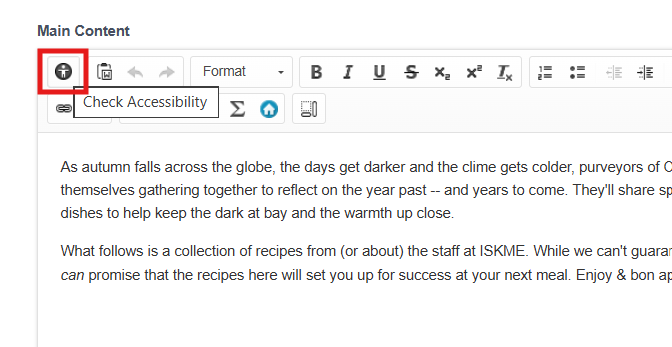 The tool will review the current section and highlight any potential issues, giving you an opportunity to remediate them and ensure your new resource is accessible to users who use assistive hardware and software when using a computer.
 - If the resource has downloadable attachments, be sure to download them to your device and then re-upload them into the appropriate section of the new resource.
- Be sure to use the Accessibility Checker in each text editor window to identify and remediate issues that were present in the original resource:
- After you’ve finished copying content to the new resource, continue to the next step to describe the resource and publish it. Our librarians will review the item, typically within 24-48 hours, and publish it if it meets the standards set out in our Collection Policy.
Option 2: export to Google Docs
If the Open Author 1 resource’s license permits it*, you can also easily export items from Open Author 1 to a new Google Doc. After signing in to your OER Commons account, view the resource and click “Export to Google Docs.” This will create a new GDoc and copy the resource’s materials into it.
Note on GDocs and resource attachments/embedded videos: Exporting to Google Docs will not copy any attachments that the resource has, nor embed any video content. Instead, the new GDoc will include links to the resource’s attachments hosted on OER Commons’ servers, but these attachments will become unavailable after the December 31 deadline. To preserve attachments, save them individually and upload them to a location of your choice. You can then update the links in the new GDoc so that they point to where you have reuploaded the attached files.
*Note on GDocs and “No Derivatives”-licensed resources: because users can select any flavor of Creative Commons license for their Open Author resources, some items may include the “No Derivatives” requirement. To help ensure this is respected, resources with CC-BY-ND and CC-BY-NC-ND licenses attached cannot be exported to Google Docs automatically from OER Commons. Where this is the case, the “Export to Google Docs” button will be grayed out and users are encouraged to use the steps outlined in Option 3 to back up the resource.
Option 3: download in a static format
Finally, OER Commons allows users to download Open Author Materials in a variety of static (i.e. not easily changeable) formats to support a variety of use cases. If you wish to download a resource as a Teaching Bundle, PDF, EPUB, or SCORM package:
- sign into your OER Commons account
- view the resource and click the blue “Download” button in the top righthand corner
- Select the format you wish to download it in.
Remain on the page as the system takes time to prepare the resource in the selected format. Once it is done, it will
automatically begin downloading to your device.
Note on static formats and resource attachments: Downloading any of the static formats will not copy any attachments that the resource has. The downloaded item will include links to the resource’s attachments where they are hosted on OER Commons’ servers, but these attachments will also become unavailable after the December 31 deadline. To preserve attachments, you’ll have to save them individually and upload them to a location of your choice.